Travel Blogging
How to Set up a 6 Person Tent?
Camping without a tent can be dangerous, especially if you are in a place loaded with bugs and wild animals. A tent will help shield you from wind, rain, sun, and outdoor pests in your camping area. Besides, it will give you enough space to store your gear and a bit of privacy outdoors.
Even if you like camping in a large group, a 6 person tent can be a great way to accommodate everyone. However, setting up a 6-person tent can be troublesome, especially if it is your first time.
Although the process is pretty simple and does not take much time, it is crucial to follow the steps in the proper order. To help you along the way, we have discussed a step-by-step guide for how to set up a 6 person tent in a quick and easy way.
Things You Will Need To Set Up A 6 Person Tent

While setting up a 6-person tent, you will need some instruments to secure your tent properly. Here is the list of those instruments that help set up your tent.
- Stakes: Tent stakes are very helpful in holding down a tent, even in harsh weather conditions. They help keep a tent anchored to the surface.
- Tarp or Footprint: A footprint or trap protects a tent from any tears and rips in rough ground. It ensures the underneath of your tent is smooth and even surface.
- Rubber mallet (Optional): Rubber mallet is usually used for banging tent pegs. With this instrument, you can easily nail any poles, even on hard surfaces.
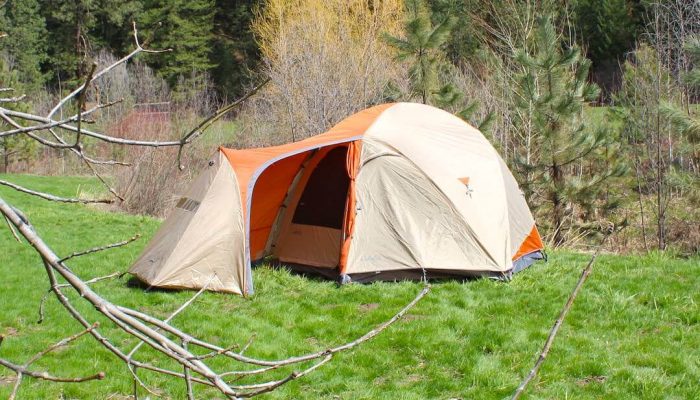
- 6 person tent: Large size tents are ideal for those who like to camp with groups. In that case, you can choose a 6 person tent for comfortable stay that also ensures accommodation for all.
How To Set Up A 6 Person Tent

Once you manage all the instruments, you can go forward to setting up a 6 person tent. Here, we have provided a step-by-step guideline in this regard for your help.
Step 1: Find A Flat Area To Pitch Your Tent
Before setting up your 6-person tent, find a place that is as clear, flat, and level as possible. Remove all sticks, stones, pine cones, or debris on the ground.
If you don’t, the base fabric of the tent may fraction against these materials, prematurely ripping and flaking. This can reduce the longevity of your tent.
Step 2: Place A Footprint On The Ground
Place a footprint or a trap on the cleared ground to prevent punctures and abrasion in the tent. This will protect your tent floor from small stones and branches that can cause tiny holes.
Most tents usually come with a footprint. If your tent kit doesn’t include one, consider purchasing a supplemental footprint or trap.
Step 3: Unpack Your Tent
Unfold your tent and keep stakes, poles, and other pieces orderly on the ground. Then, stretch the tent, taking help from one more person on base across the footprint or trap.
Pull the tent tightly and stick it at two opposite corners to tighten the floor of your tent. Use a mallet to drive the stakes in if the ground is stiff.
Step 4: Assemble The Tent Poles
Some tents have attached poles to the tent fastener. If your tent’s poles are separate, you will need to join all of them. Poles are usually either screwed or snapped together via a shock cord. Connect all the pieces for each pole so that it’s fully extended.
Step 5: Attach The Tent To The Poles
After connecting all the pieces, lay them out. Now specify which pole goes in which sleeve. You can follow the color codes to make this step easy. If your poles are not color-coded, check out the instruction manual.
Then, slide the poles through your tent’s sleeves until they reach the opposite corner. After that, attach the tent pole’s end to each loop. This way, the tent will stand up and get its shape.
Step 6: Attach The Rain Fly And Stake It down
Once you have slid all the poles through the sleeves, add a rain fly fabric over the top of the tent. It will help keep you and your belongings dry in the rain.
To prevent your rain fly from blowing away in windy conditions, stake down the corners. You will also find some fly rain with metal grommets in the corners to attach to the hooks or ties.
Step 7: Raise The Tent
Elevate one of the main poles to raise the tent. Make sure the outside of your tent and each end of the pole have fastened. Repeat the process with the cross pole and extra support poles until the tent is fully popped up and accessible. If your tent has any additional fasteners or clips along the poles, be sure to check them.
Step 8: Add Final Stakes And Supports
Some tents come with ropes that help keep the tent stable in harsh weather. If your tent doesn’t come with any, you can buy one from your local sports shop.
However, stake all the remaining edges of your tent and secure the ropes that you need to stabilize your tent. Now that your tent is set up, you can take full advantage of your camping trip.
When Will You Need A 6 Person Tent?
A 6-person is a good choice for families looking to go camping for recreation. The size of these tents is also great for young adults who want to enjoy the outdoors with a group of friends.
Also, campers who are looking for something with plenty of space for in-tent activities will need 6-person tents. Typically, 2 and 4 person tents are ideal for those looking for lightweight camping, have minimal features, and are less expensive.
On the other hand, 6-person tents are made for ensuring maximum comfort, durability, and additional movement inside the tent. Camping inside a 6-person tent, you will get enough room to do anything you wish.
In a 6-person tent, you will get around 80-100 square feet of base space. This space is enough for the lives of 6 people comfortably or to store necessary gear.
Common Mistakes To Avoid When Setting Up A 6 Person Tent

It is crucial to follow the right procedure when setting up a tent. Otherwise, you take full advantage of your tent as well as camping. Check out some common mistakes that most campers make while setting up a tent below.
Not looking Up
When setting up a tent, most campers look at the ground and trees instead of looking up. There are several reasons you should look up while setting up a tent.
For example, you need to ensure that there are no beehives, spider webs, etc., on top of your tent’s setting place. Besides, a tree branch that is rotten, broken, or hanging falls on you, causing serious injuries.
Not Staking Tent
Most campers think that staking a tent is overdoing and is only required in extreme weather conditions. As a result, a sudden gust of wind can pop up at the bottom of the tent. In that case, staking your tent properly will ensure you and your necessary gear remain safe.
Not Giving Time
Setting up a tent properly requires some time. Even experienced campers sometimes need hours to set up a tent. A small mistake can add more and more time to your setup procedure.
Besides, if you are not able to set up a tent in time, you will have to set up a fire before night falls. In that case, give yourself sufficient time to set up a tent.
Being Unaware Of The Sun
The sun is a crucial aspect while setting up a tent. In the summer, camping in direct sunlight can increase the temperature inside your tent by tens of degrees.
Besides, setting up a tent out of sunlight in the winter will make you cooler than it should be. So, you should choose a place to set your tent based on your comfort.
Not Looking For Good Ground
Sleeping on uneven ground will be difficult for any camper. Even if you have a good tent and a sleeping pad, the uneven ground makes you feel uncomfortable.
So, you should find the right ground that is quite even and free from stones, branches, and roots. Additionally, avoid lower places where a little rain transforms into a pond.
Conclusion
Having the right tent is essential when you are on a camping trip with your family members or friends. In that case, a 6-person tent will be a good choice to ensure sufficient space for all members.
Just having a tent is not enough; you will need to know how you can properly set up a 6 person tent. That’s why we have already presented adequate information about setting up a 6-person tent.
You will just have to go through the steps discussed above to set up your tent. However, it is common to make some mistakes while setting up a tent. To avoid such mistakes, check out the section above to be aware of these mistakes.
